
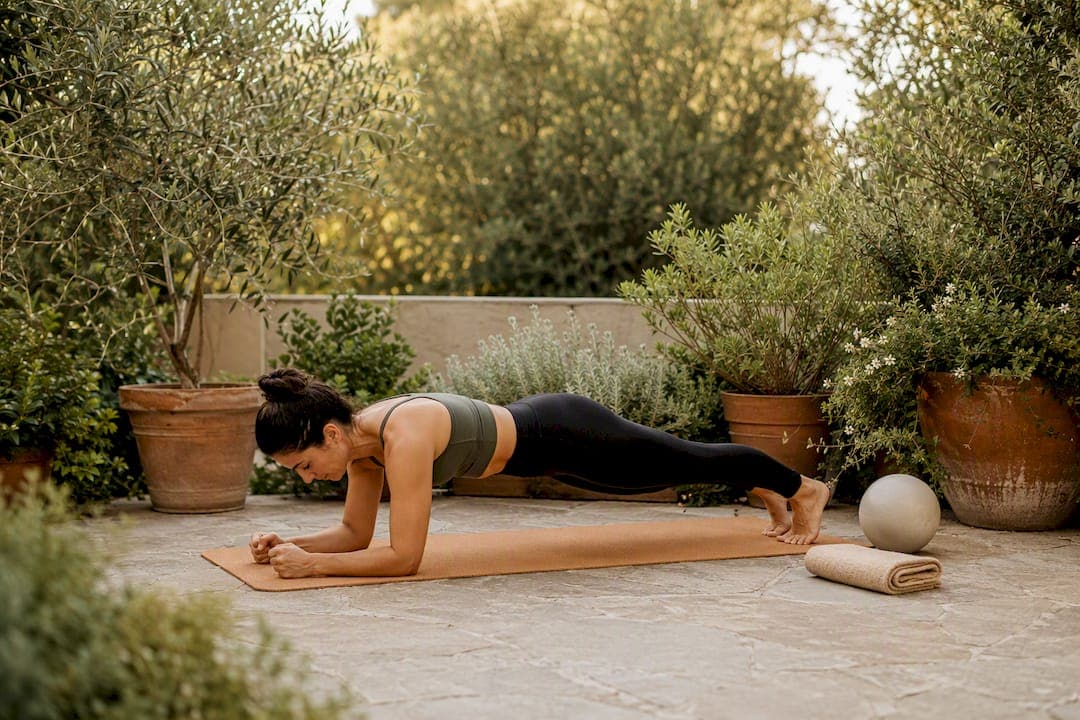
Stabilisation exercises fall into three main types: static, dynamic and integrated, each building on the last to train your body to resist unwanted movement rather than just create it. Static holds like the front plank teach your trunk to stay still under load. Dynamic moves like the dead bug or bird dog add limb movement while your spine stays put. Integrated work like carries and the Turkish get-up mimics the real-life demands of lifting, twisting and walking.
Start with these:
- Front plank (static)
- Side plank (static)
- Dead bug (dynamic)
- Bird dog (dynamic)
- Glute bridge march (dynamic)
- Single-leg deadlift (integrated)
- Suitcase carry (integrated)
- Pallof press (integrated)
- Stability-ball dead bug (dynamic, progressed)
- Turkish get-up, scaled (integrated)
A 2025 meta-analysis found supervised programmes running 8 to 12 weeks produced significantly better pain and disability outcomes for chronic low back pain than shorter or unsupervised alternatives. That timeframe isn't arbitrary. It's roughly how long your nervous system needs to relearn efficient movement patterns.
Key Takeaways
Progressing from static to dynamic to integrated stabilisation exercises, held over a structured 8 to 12 week block, delivers measurably better pain, function and injury-prevention outcomes than random exercise selection.
| Point | Details |
|---|---|
| Follow the taxonomy in order | Master static holds before adding dynamic limb movement, then integrated loaded tasks. |
| Commit to 8 to 12 weeks | Shorter programmes rarely give your nervous system enough time to relearn movement patterns. |
| Prioritise form over hold time | A clean 20 second plank beats a wobbly 60 second one for building real stability. |
| Watch for red flags | Radiating pain, numbness or worsening weakness need clinical review, not more training. |
| Get eyes on your technique | Elevateandrestore's small-group sessions (max six people) let trainers correct co-activation errors in real time. |
Table of Contents
- What are stabilisation exercises and why do they matter?
- The three approaches: static, dynamic and integrated
- Exercise library: ten stabilisation moves worth learning
- How often should you train, and for how long?
- Common mistakes and when to see a professional
- How Elevateandrestore assesses and progresses stabiliser work
- The gap between generic advice and what actually works
- Supervised, small-group stabiliser training in West Footscray
- Selected research and guidance cited in this article
- Sources
What are stabilisation exercises and why do they matter?
Stabilisation training isn't the same as general strengthening. A biceps curl builds a muscle's capacity to move a joint. A stabilisation exercise trains muscles to prevent movement, holding a joint or segment still while everything around it works. This is sometimes called anti-movement training, and it relies on co-activation, multiple muscles firing together to lock a region down rather than drive it through range.
The deep stabilisers doing this work rarely get mentioned in a standard gym session: the transverse abdominis, the pelvic floor, the diaphragm and the multifidus along your spine. Together they manage two distinct jobs. Intervertebral stability keeps individual spinal segments from shearing against each other. Lumbo-pelvic stability keeps your pelvis level while your legs move independently, which matters every time you walk up a hill or step off a curb.
Stabilisation programmes reduced pain and disability more than many comparison interventions in chronic low back pain sufferers, with a large effect size favouring structured stabilisation work over passive or general approaches.
That's not a fringe result. It's why core stability training sits at the front of most sensible rehab and performance plans, not tacked on at the end.
The three approaches: static, dynamic and integrated
NASM's progressive core training model treats these three approaches as sequential phases, not interchangeable options.
- Static stabilisation trains muscular endurance in a fixed position. Front planks, side planks and dead-bug holds (paused, not moving) belong here. A reasonable short-term goal is holding a plank for 30 seconds with a neutral spine and no hip sag. Once that's easy, static work stops giving you much return.
- Dynamic stabilisation keeps your trunk still while your limbs move. Dead bugs with alternating reach, bird dogs, and forearm planks with toe taps all fall into this category. This is where most adults should spend the bulk of their early training weeks, because it teaches the brace to survive under changing load.
- Integrated stabilisation combines trunk control with a functional task: a loaded carry, a single-leg deadlift, a Pallof press, or a scaled Turkish get-up. This is the category that transfers directly to picking up shopping bags, twisting to grab something off a back seat, or standing on one leg to put on a shoe.
Moving through static, then dynamic, then integrated work better mirrors how stability progressions transfer to real-world tasks than jumping straight to loaded, complex movements before the basics are locked in.
Exercise library: ten stabilisation moves worth learning
Front plank. Forearms down, body in a straight line from shoulders to ankles. Cue: "ribs down, glutes squeezed." Common fault: sagging hips as fatigue sets in. Regress to a bent-knee plank on your knees. Progress to a plank with alternating shoulder taps.
Side plank. Stack your feet, prop up on one forearm, lift your hips until your body forms a straight line. Cue: "push the floor away, stack your shoulders." Fault: rotating the hips forward. Regress with a bent-knee side plank. Progress to a top-leg raise.
Dead bug. Lie on your back, knees bent to 90 degrees, arms reaching up. Lower one arm and the opposite leg towards the floor without letting your lower back arch off the mat. Cue: "exhale as the limb lowers, ribs stay heavy." Fault: letting the back arch. Regress by moving only the arm or only the leg. Progress by adding a light dumbbell or resistance band.
Bird dog. From all fours, extend one arm and the opposite leg while keeping your hips level. Cue: "reach long, don't rotate." Fault: hiking one hip up. Regress to arm-only or leg-only extensions. Progress with a resistance band looped hand to foot.
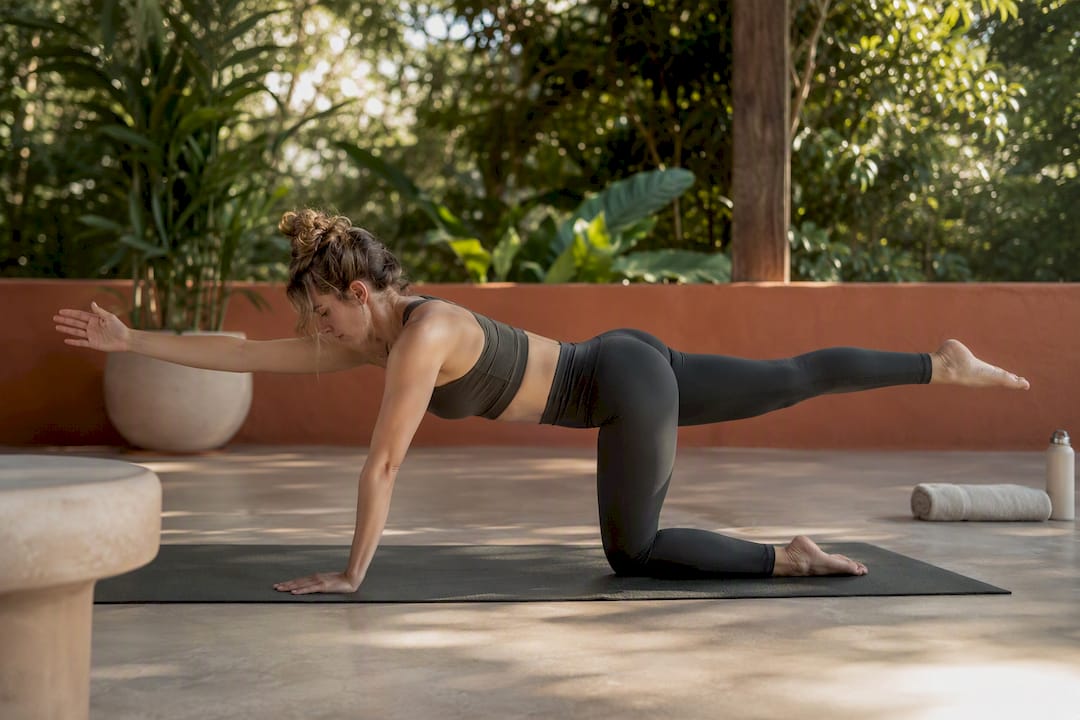
Single-leg deadlift. Hinge at the hips on one leg, reaching towards the floor while your other leg extends behind you. Cue: "hips square, soft standing knee." Fault: rounding the lower back. Regress by touching a box or bench for balance. Progress by adding a kettlebell in the opposite hand.
Glute bridge march. Bridge your hips up, then lift one knee towards your chest without letting your hips drop. Cue: "squeeze glutes before you lift the leg." Fault: hips tilting sideways. Regress to a static bridge hold. Progress by adding a mini-band above the knees.
Suitcase carry. Walk holding a weight in one hand, resisting the urge to lean away from the load. Cue: "tall spine, ribs stacked over hips." Fault: side-bending towards the weight. Regress with a lighter load over a shorter distance. Progress to a farmer's carry with weight in both hands, uneven loaded.
Pallof press. Anchor a band or cable at chest height, press it straight out from your sternum while resisting rotation. Cue: "don't let the band twist you." Fault: leaning back to counterbalance. Regress with a shorter press range. Progress by stepping further from the anchor point.
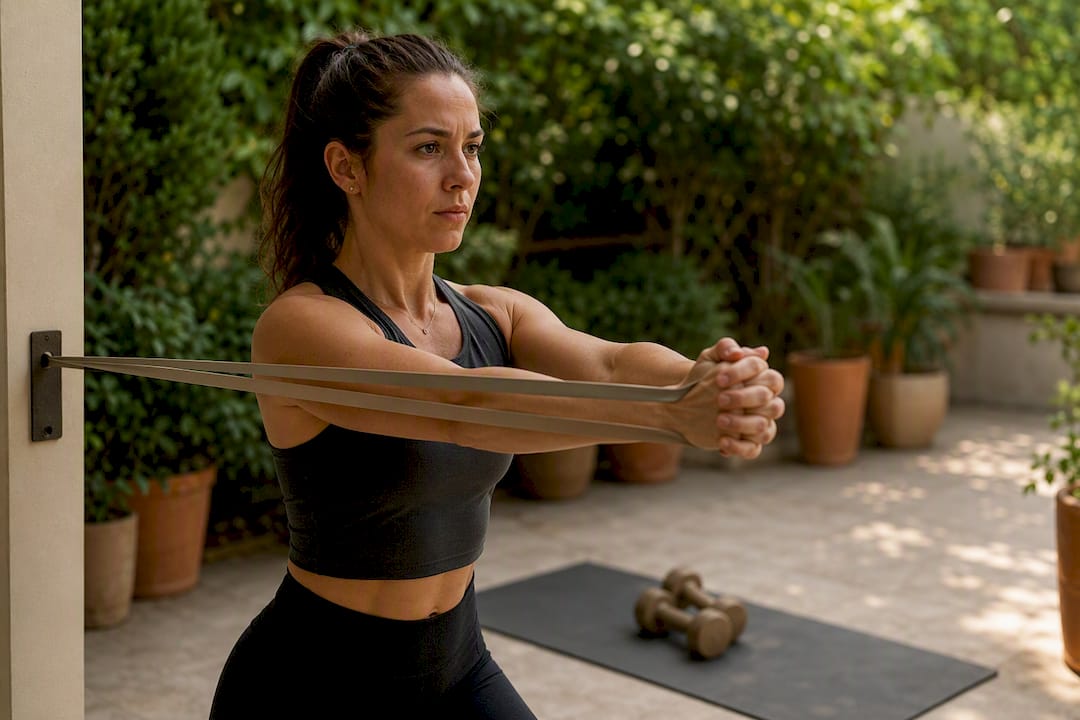
Stability-ball dead bug. Hold a stability ball between your hands and knees, then extend opposite limbs while keeping light pressure on the ball. Fault: losing ball contact. Regress by using a smaller, softer ball. Progress by adding a slow tempo count.
Turkish get-up, scaled. Roll from lying to standing while holding a light weight overhead, moving through each checkpoint slowly. Fault: rushing the transitions. Regress by practising it with no weight first. Progress by adding load once every checkpoint is controlled.
Pro Tip: Breathe out through pursed lips during the hardest part of each rep. Holding your breath spikes intra-abdominal pressure and often masks poor control rather than fixing it.
These patterns show up throughout the clinical literature on spine stabilisation precisely because bridge and bird-dog style movements challenge trunk muscles without loading the spine heavily, a genuine advantage for anyone easing back into training after pain or time off.
How often should you train, and for how long?
- Beginners should aim for two sessions a week, focusing entirely on static and early dynamic work for the first two to three weeks.
- Intermediate trainers can move to three sessions a week, layering in dynamic and early integrated exercises once static holds feel easy.
- Anyone returning from injury or a long break should start at beginner frequency regardless of prior fitness, and progress only when form stays clean under fatigue.
A workable 8 to 12 week block looks like this: weeks 1 to 3 build static endurance (aim for three 30 to 45 second plank holds), weeks 4 to 6 shift to dynamic patterns like dead bugs and bird dogs for higher reps, and weeks 7 to 12 introduce integrated, loaded work such as carries and single-leg deadlifts. Increase hold time or reps before you increase load, and only add an unstable surface (a stability ball, a foam pad) once the stable version is genuinely easy.
Stabilisation work slots in well alongside broader training. Use it as a warm-up primer before strength sessions, or as a standalone block on lower-intensity days between HIIT or cardio sessions.
Common mistakes and when to see a professional
Watch for these errors, all of which quietly undermine an otherwise good exercise:
- Holding your breath through the hard part of a rep, which spikes pressure without improving control
- Letting the lower back arch or flatten excessively during dead bugs and bird dogs
- Pushing through sharp, localised pain rather than a general working sensation
- Breathing so shallow the ribs barely move, a sign the diaphragm isn't engaged
Radiating pain down a leg or arm, numbness, or weakness that gets progressively worse over days needs clinical review, not more exercise. These aren't things to train through.
This is also where supervised sessions tend to outperform solo home programmes. A trainer catches the hip that's quietly sagging or the breath that's being held long before you'd notice it yourself, and corrects the pattern before it becomes a habit.
How Elevateandrestore assesses and progresses stabiliser work
In small-group sessions, checking stability doesn't require lab equipment. A single-leg hold for time, or watching how someone's hips behave during a slow plank hold, tells a trainer most of what they need to know within a minute. Groups capped at six mean every person gets that individual glance most gyms simply can't offer at scale.
Recruitment quality matters more than volume. Cueing a lower rib draw-in, checking breath timing against the movement, and correcting outer-abdominal dominance before adding load are all standard priorities in our sessions, because loading a poor pattern just makes the poor pattern stronger. Readers wanting that kind of eyes-on correction can find it in our reformer Pilates classes, where small numbers keep coaching genuinely hands-on rather than shouted across a crowded room.
The gap between generic advice and what actually works
Most stabilisation advice online treats the three categories as a menu, pick whichever exercises look interesting and string them together. That's backwards. The research is fairly clear that sequence matters: static endurance has to be established before dynamic limb movement makes sense, and dynamic control has to be solid before integrated, loaded tasks are worth attempting.
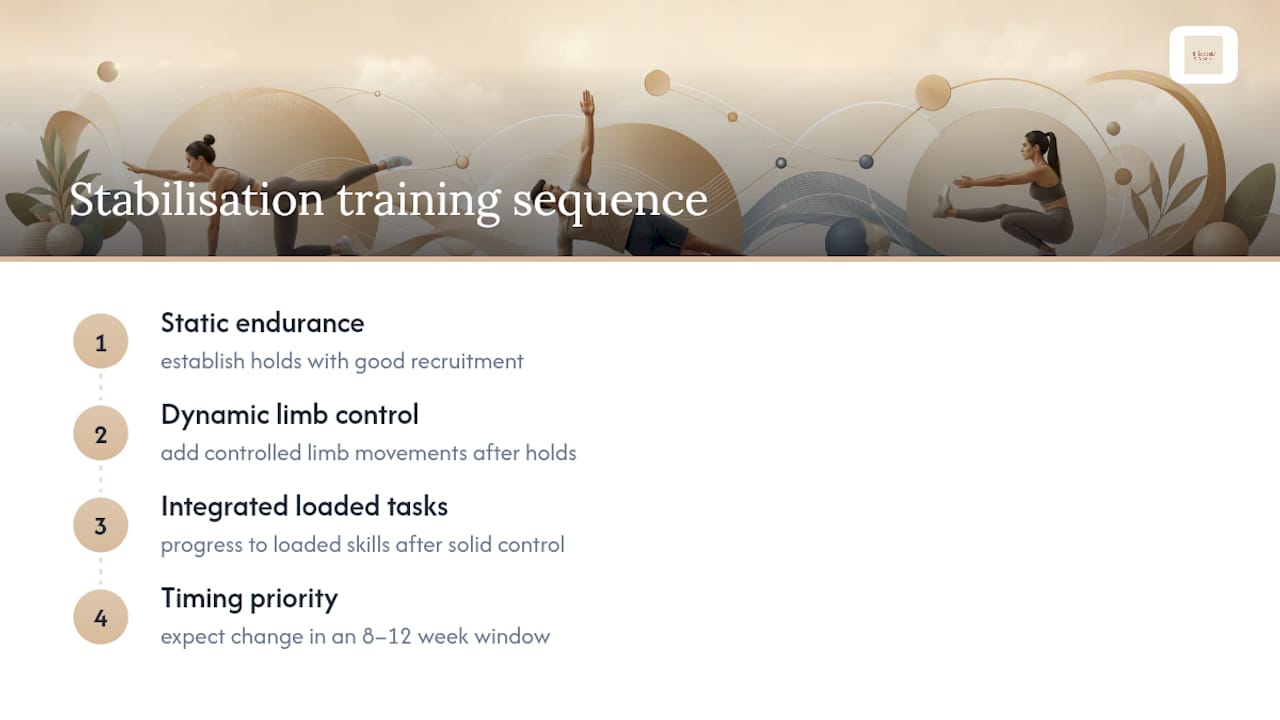
The bigger blind spot is time. People expect results in two weeks and quit before the 8 to 12 week window that the evidence actually supports even gets close to finishing. That timeframe isn't a marketing device; it reflects how long motor learning genuinely takes.
If there's one thing worth prioritising over everything else in this article, it's recruitment quality over exercise variety. A perfectly executed 20 second plank teaches your nervous system more than a wobbly 60 second one. Chasing hold times before chasing form is the single most common way people waste months of otherwise good training.
Supervised, small-group stabiliser training in West Footscray
Elevateandrestore is the alternative to guessing your way through a home stabilisation programme, small reformer Pilates groups capped at six mean a trainer can actually see whether your hips are sagging on rep eight, not just rep one. That's the gap most solo YouTube-and-a-mat routines can't close, no matter how good the exercise selection is.
Our sessions build directly from the static, dynamic and integrated progressions covered above, cued live, corrected in real time, and paired with a recovery hub (infrared sauna, cold plunge, hot tub, compression boots) for the muscle recovery that lets you train consistently through a full 8 to 12 week block. If you're carrying a niggle or just want someone watching your form, book a class through our Pilates page or explore recovery sessions to pair with your training week.
Selected research and guidance cited in this article
- Pain and Disability Therapy with Stabilization Exercises in Patients with Chronic Low Back Pain: A Meta-Analysis
- Core Stability Exercises: Targeting Progressive Core Training
- Effects of stabilization exercise on lower limb functions: a scoping review of the literature
- Stability and balance
Sources
- Pain and Disability Therapy with Stabilization Exercises in Patients with Chronic Low Back Pain: A Meta-Analysis
- Core Stability Exercises: Targeting Progressive Core Training
- Effects of stabilization exercise on lower limb functions: a scoping review of the literature
- Exercises for Spine Stabilization: Motion/Motor Patterns, Stability Progressions, and Clinical Technique